


Tesla touchscreen issues range from software glitches to physical damage, requiring replacement in severe cases. Before replacing a Tesla touchscreen, gather necessary tools, materials, and safety gear. This DIY guide outlines preparation, removal of old units using suction cups, installation of new touchscreens in reverse order, emphasizing keyword Tesla touchscreen replacement for successful repairs.
Are you a Tesla owner facing touchscreen issues? This comprehensive guide is your go-to resource for navigating the process of replacing your Tesla’s touchscreen. Understanding common malfunctions and gathering the right tools are key steps before diving in. We’ll walk you through each stage, from identifying problems to installing a new screen, ensuring a successful DIY replacement. Get ready to take control and revive your Tesla’s display!
- Understanding Tesla Touchscreen Malfunctions
- Gathering Necessary Tools and Materials
- Step-by-Step Guide to Replacing Your Touchscreen
Understanding Tesla Touchscreen Malfunctions

Tesla Touchscreens are integral to the driving experience, offering everything from navigation and entertainment to vehicle control and safety features. However, like any technological component, they can malfunction due to a variety of reasons ranging from software glitches to physical damage. Understanding common Tesla touchscreen issues is crucial for owners looking into potential Tesla touchscreen replacement.
Some typical malfunctions include unexpected shutdowns, unresponsive touch inputs, display distortions, or even complete failure to boot up. Often, these issues are software-related and can be resolved through updates or re-initializing the system. However, more severe problems like physical damage from accidents or scratches might require professional intervention. In such cases, considering a Tesla touchscreen replacement becomes necessary, especially when dealing with collision repair or scratch repair to maintain the vehicle’s aesthetics and functionality.
Gathering Necessary Tools and Materials

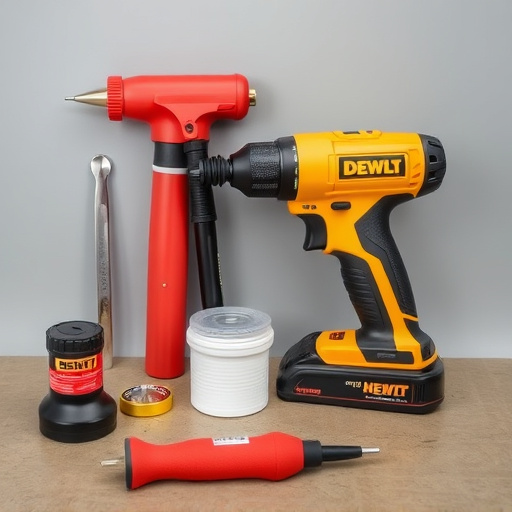
Before taking on a Tesla touchscreen replacement, it’s crucial to gather all the necessary tools and materials. For a successful DIY project, you’ll need specialized equipment designed for precise car electronics work. This includes a suitable screwdriver set tailored for your Tesla model, with specific tips for the dashboard screws. A high-quality replacement touchscreen assembly is essential, ensuring compatibility with your vehicle’s system. Consider purchasing a part from a reputable source to guarantee both functionality and longevity. Additionally, stock up on adhesive tapes specifically formulated for car interiors to secure the new touchscreen firmly in place.
Don’t forget protective gear like gloves and safety glasses, as they safeguard against static shocks or debris during disassembly. For complex operations, a heat gun can be useful for carefully melting away old adhesives. While a basic toolkit will suffice for some repairs, certain body shop services might require more advanced tools, such as a vacuum pump or specialized lifts, especially for classic car restoration projects involving intricate dashboard work.
Step-by-Step Guide to Replacing Your Touchscreen

Replacing your Tesla’s touchscreen is a straightforward process that can be completed by most owners with some basic DIY skills. Here’s a step-by-step guide to help you through it:
1. Preparation: Start by ensuring your vehicle is powered off and unplugged. Gather all the necessary tools, including a new touchscreen, a suction cup, and any other accessories provided with the replacement part. Create a clean workspace in your garage or a suitable area where you won’t be disturbed.
2. Remove the Old Touchscreen: Using the suction cup, carefully lift and peel off the old touchscreen from the dashboard. Take note of how each component is connected and in what order for easier reassembly. Some models may require the removal of surrounding panels or trim pieces to access the touchscreen securely. If you’re not comfortable with disassembling your vehicle, consider seeking help from a professional or a trusted body shop service.
3. Install the New Touchscreen: Place the new touchscreen in position and secure it following the reverse process of removal. Ensure all connections are properly aligned and firmly attached. Reattach any panels or trim pieces that were removed earlier. Double-check that all functions, including buttons, sensors, and cameras, operate correctly after the replacement. For a classic car restoration or if you’re not confident in your DIY abilities, it’s always best to consult a specialized technician who offers car paint services and body shop services for precise and reliable results.
Replacing your Tesla’s touchscreen is a manageable task for owners with the right knowledge and tools. By understanding common malfunctions, gathering the necessary parts, and following a detailed guide, you can successfully navigate this process. This DIY approach not only saves costs but also empowers owners to take charge of their vehicle’s maintenance. With a bit of patience and attention to detail, you’ll have your Tesla touchscreen functioning like new again. Remember, for any complex repairs, seeking professional assistance is always an option. Happy troubleshooting!